Tuesday, January 11, 2011

April-The Gyeongbokgung Palace,Seoul,South Korea

'2012 around the world'- Korea
Below are the steps that show how i done my work.

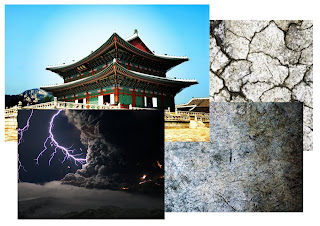
These are the images that i've used
for this month.
Open the original image. [File>Open]
Change the levels of the image.The ratio of level that i changed as shown below.
Then,place a cracked floor texture image on it. [File>Place]
Place, rotate and adjust the size of the cracked floor image until it look like this:
Add layer mask to the floor layer to remove the unwanted part.
Choose brush tool and make sure that the foreground color is black.
Then paint on the area that wanted to remove.
After that, change the vibrance of the image as shown below to make the building look like a litle bit old. [image>adjustment>vibrance]
Place another texture on it.
I've choose the image below.Then adjust the size of the image to fit the image underneath.
Change the blend mode to 'Soft Light'
Place another image for the sky. [File>Place]
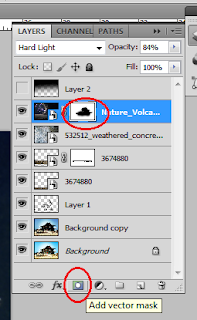
Adjust the image then add layer mask and remove the unwanted part with brush tool(foreground color=black).
Then,change the blend mode of the layer to 'Hard Light'.
Add a new layer and go for brush tool.Now i'm going to make some cracked effect to the building.
Choose different type of cracked brush and stamp to the building.

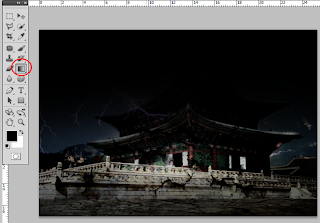
Add another new layer and go for gradient tool. [black to transparent] Then drag the line and make the gradient look like the image below.
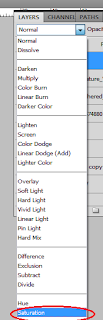
Change the blend mode to 'Saturation'.
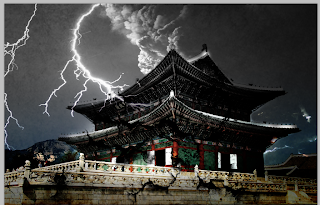
Currently done :
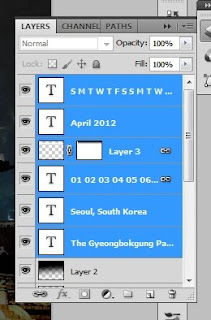
Finally add the text and the calendar dates with horizontal type tool.
Add the name of the place and the calendar.

FINAL OUTCOME

Malaysia Holiday - 2012

23 January (Monday) : Chinese New Year - Day 1

24 January (Tuesday) : Chinese New Year - Day 2
5 February (Sunday) : Prophet Muhammad's Birthday
1 May (Tuesday) : Labour Day
2 June (Saturday) : Yang di-Pertuan Agong's Birthday
19 August (Sunday) : Hari Raya Puasa - Day 1
20 August (Monday) : Hari Raya Puasa - Day 2
31 August (Friday) : National Day
16 September (Sunday) : Hari Malaysia (Malaysia Day)
26 October (Friday) : Hari Raya Haji
11 November (Sunday) : Deepavali
15 November (Thursday) : Awal Muharram
25 December (Tuesday) : Christmas Day

Image for Japan in Calendar


Before I start my calendars, I had search many images. This are the few image that I found out is more suitable for my calendar theme, disaster on Japan.

these are the images used in the process


Step 1: First I select an image by going to: File> Open…, or Ctrl+O to place the image of Fuji Mount as the symbol of Japan.


Step 2: Double click on the background image to unlock it. And change the name into Fuji mount.


Step 3: Change the Document Size to A4 size 29.7cm*21.0cm, Resolution to 300pixels /inch by going to: Image> Image Size, or Alt+Ctrl+I


Step 4: Add a layer mask (1). Then use brush tool (2), quick selection tool (3), and polygonal lasso tool (4) to delete the unwanted part into transparence.

Step 5: Select a new image by repeat step 1. Then click on Arrange document (1)> 2 up. Now, you can see the image of Fuji Mount and the new image of volcano. Click the image of volcano, hold on with the image and then move it to the Fuji mount image.
This image shows the after the step 5, transform from 2 file of image combine into 1 file.


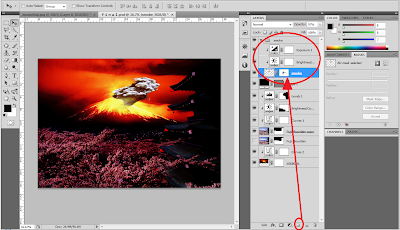
Step 6: Adjust the volcano image (1) by going: Edit> Free Transform, or Ctrl + T. Next, to make the Fuji Mount image become more darker, use the adjustment on the right hand side(2) by clicking: adjustment> Brightness/Contrast. Then
click Alt on the Brightness/Contrast level, so that the adjustment is just for the Fuji Mount image.


This is the adjustment that I had been set.

Step 7: This step is to readjust all the level to make the image fell ‘combine’. I had repeated using the adjustment such like step 6 by clicking: Adjustment > Curve, or Ctrl+M, and Adjustment> level, or Ctrl+L.
During the adjustment, I had use brush tool (1) to erase the part that I do not want to adjust. Select the (1) part and click on brush tool. The color setting of black and white color (3) is very importance. Black color on foreground is to delete the part, while White color on foreground color is to return the delete part. You can see the result of using brush tool at (1).


Step 8: Select a new image, name Smoke by repeat step 5. After the Smoke image was added, use adjustment> Brightness/Contras and adjustment>Expose. Next, to make the level become tidier, select Create a new group name smoke. Select all the level that were related with the smoke image and pull it to the smoke file.
Step 9: Create a new group name Fuji Mount by repeating step 8 (1). After finish, I turn opacity into 41% on smoke image (2) to feel more transparency.


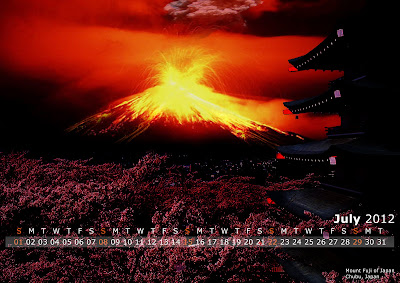
This is the final image looks like, disaster (volcano expose) in Japan.


Calendar of July 2012 is finish!


Tuesday, December 21, 2010

Image for US in calender

Based on our theme "2012 Around the World", I've created an image for the country U.S.. Below are the steps and explanation on how the image is done:

these are the images used in the process

First I created a new canvas which is landscape a4 sized and placed the image of the sea onto it.

By using free transform (ctrl+T) I resized the image and place it covering around half of the canvas. Then, I used the magic wand tool to select and remove the unwanted part.

To create a stormy color for the sea, we need to change the levels and color balance. Go to Image>Adjustment>Color Balance/Levels.

These are the settings I've used.

Next, place the image of the cloud on the layer behind the 'sea' layer. By using the healing brush tool I removed the lights on the clouds by selecting the darker areas to give a more gloomy feel.

Next, open the statue of liberty image on a new tab and crop the background out by using the magic wand tool. Place it on a new layer, use free transform to resize and flip it horizontally and place it as shown in the image. Next, go to Image>Adjustment>Match Color and select the cloud layer as the source. 

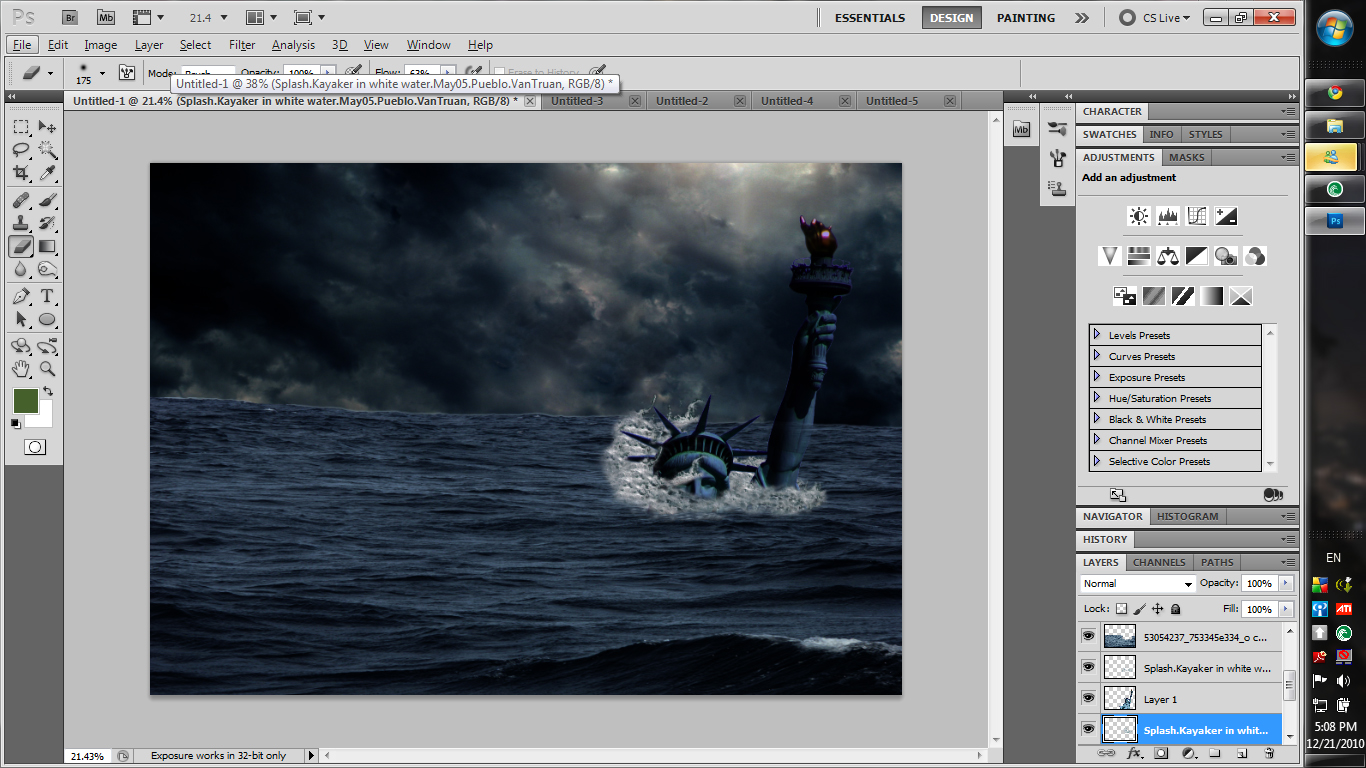
Duplicate the sea layer by pressing ctrl+J and select the eraser tool and soft brush, erase till the head and arm of the statue is visible.

Duplicate and crop out a bottom of the sea, where there is a wave breaking. Set the blend mode to lighten and remove unwanted parts with the eraser tool. 

Place the wave as shown in the image and use the clone stamp tool to create more waves around the statue.


Next, place the image of the man kayaking and resize it to desired size. By using the eraser tool and soft brush selected, remove the man and unwanted sea water; leaving only the splashes. 

Place the wave layer under the statue layer. Use clone stamp to create more splashes, making it more realistic. Keep on cloning until you are satisfied with the results.


Duplicate the wave layer and place the layer above the statue layer. Again, use clone stamp tool to create more splashes around the face and arm of the statue.

Open the boat image on a new tab and match the colors of the sea by going to Image>Adjustment>Match Color and select the sea layer as source. Roughly cut it out and paste it on the original project after that. Set the blending mode to pin light and erase unwanted sea water using the eraser tool. Then, duplicate the layer and set the blending mode to normal and erase everything else except the deck and the mast.

 For the storm effect, place the lightning image on a new layer. Match the colors to the colors of the sea.

Copy the image into the main project, resize and position it behind the sea layer. Change the blending mode to Lighten and erase the background with eraser tool.

Now for the rain effect, create a new layer (ctrl+shift+N) and go to Filter>Render>Clouds. Make sure the color palette is set to white and black before that. Then, go to Filter>Noise>Add Noise and add 60%Gaussian Monochromatic noise to the clouds. After that, go to Filter>Blur>Motion Blur and set the values to angle 74 and distance 44.


Change the layer's blend mode to screen and the opacity to 16%. Lastly, I adjusted the color balance as shown in the image: 

After the adjustment, this is how the final image looks like:


This is the image after the calender is added in. 

Monday, December 20, 2010

Calender Interface Final Decision

After discussion, the interface of the calender is changed. Each of our members gave their suggestion and ideas and after adjustments and corrections, the outcome for the new interface is:

The orange highlighted days indicates weekends and public holidays will be highlighted with yellow (fff200) and the holiday will be written under the respective date.

Sunday, December 19, 2010

Country and month

the are 12 month on a calendar. therefore, we had decided to do different country based on each month.

name list for the members to in charge on calender 2012:

*Te Chin Yong:
month: January, February, March
country:Malaysia, Cambodia, Arab
*Yau Fen Nie:
month: April, May, June
country:Korea, Australia, Italy

*Tang Yook Meng:
month: July, August, September
country: Japan, China, England

*Pook Khim Wui:
month: October, November, December
country: United State of America, Egypt, France


Saturday, December 11, 2010

Our calendar interface by using AI

This is basically how our calendar will look like. The grid of dates will overlay the image.Then , the month will fit in the grid of date with white color 50% transparency by the font, stencil std bold, and the days(18.48pts) as well. The font of dates(15.4pts) would be impact. Other than that, a white color 35% transparency rectangular will placed as the background of the dates so that the days and dates can be seen clearly.
Example :
Public holiday and school holiday will be stated, and the special day as well. And they will differentiate with color background or certain symbol. Other than that, the special day and the meaning of the color background will be stated too.

*Changes of layout might be occur if we have a better idea.


By,
Fennie